My experience from Business Intelligence for the last 15 years involves mainly
- Microsoft SQL Suite - SQL, SSIS, SSRS, SSAS [olap/tabular], PowerBI
I have designed and maintained a complete data warehouse from scratch including both olap an tabular cubes.
Back in the days, all reports were built in Reporting Services (called Paginated Reports now a days).
But PowerBI is really the tools everyone likes to use now. - Data Warehousing in SQL/Azure Synapse environments but sources from all possible places
In my current role as BI-developer I am maintaining and extending an enterprise data wahouse with more than 15 ERPs flowing it's data to the DW in SQL Synapse (formerly SQL Data Warehouse). - Data Vault 2.0
The last project involves modeling all source data into a Data Vault 2.0 which feels like a fresh solution that is close to only inserts to the database. - Star schema marts
Consumers like to pull their data from start schemas which is more or less self described. And a good choice to provide self service within the business. - Automation Tools for ETL generation (Bimlflex, Darwin) even though I've created bunch of solutions manually too
- Azure Data Factory
ADF is a pretty good engine to move data in the azure envionment and allows for a streight forward CI/CD using DevOps. - Logic Apps
When sending messages between BI-environments in the cloud Logic App is a streigth forward and pretty easy tool to setup APIs in. - CI/CD in Devops (release pipelines)
Development in dev-env, tests in test-env then deploy to production is the only way to run your continous development - Currently evaulating Microsoft Fabric using delta-parquet for a replacement of the current Azure Synapse DW
Contact me if need any help of want to discuss opportunities.
Publish dacpac to fabric lakehouse using servicePrinciple authentication in Devops
Background
I have recently been struggling with an implementation where I had to setup an automated publish from devops to a fabric lakehouse and thought I might share this with other users that are facing the same challenge.
Remember to add you service principle with permission on the whole workspace, or preferable as a read only user on the lakehouse artifact, then add it to the db_owner role on the sql endpoint so that it is allowed to create all you database objects.
The use case I am having is creating shortcuts on the lakehouse, then expose parts of these shortcuts in regional views to the end users.
We've created different schemas for each region in the company Europe, Americas ands Apac.
Then created database roles and entra security groups to these roles so that the access rights are administrated in the AD rather than in the database.
This way no user has access to the raw table shortcuts in the lakehouse, only the views that might share only those comapanies within the users region.
Download SQL Database project
From an existing lakehous you have the possibility to download the visual studio project as a zip-file directly from the fabric user interface. This will give you a good start if you don’t have knowledge about how to set it up from scratch.
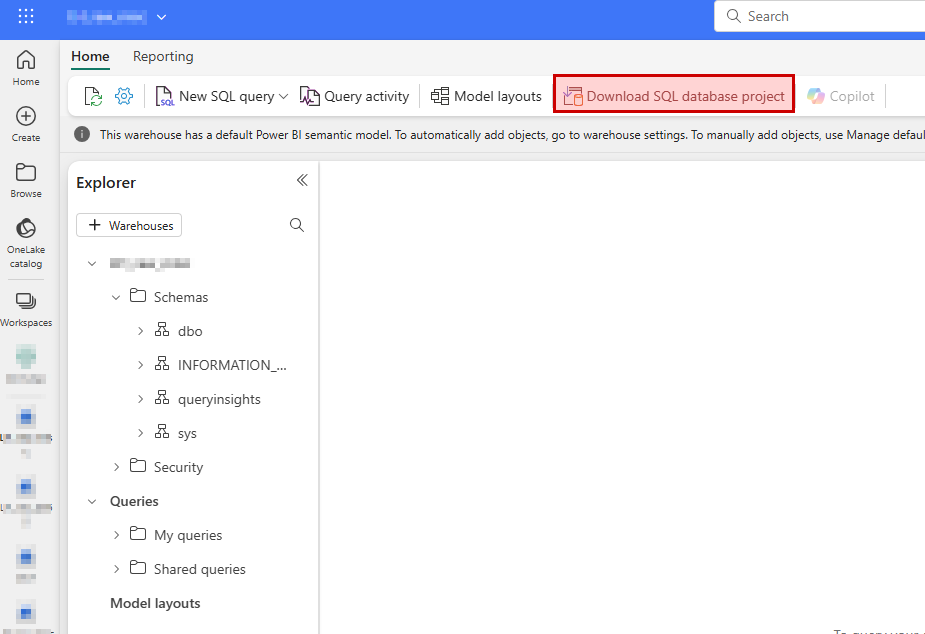
The project can be opened and edited in Visual Studio Code (download extension) or in Visual Studio Community/Pro/Enterprise if you like that better.
Devops repository
Create a new repository in devops where you commit/push the newly downloaded project.
I prefer to name all my sql database projects SQL_....
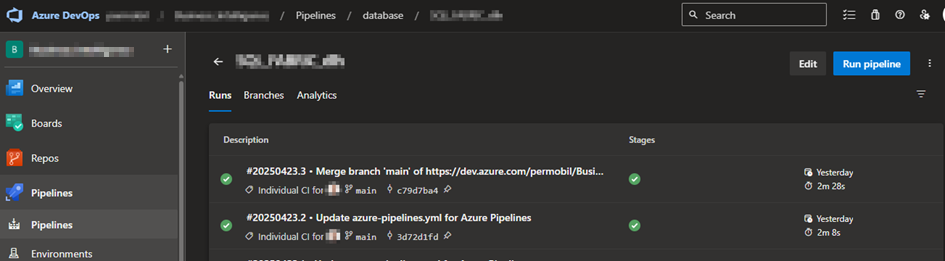
Devops build pipeline
Once the new repository has been created you will be able to setup a new build pipeline that is triggered automatically when new code is pushed to the repository.
Once you selected “New pipeline” you may choose “azure Repos Git” and point out your newly created repository.
In the next step choose “ASP.Net” so that you end up with a minimal list of tasks but having pool vmImage windows-latest and a build step.
You may remove the task “- task: VSTest@2” if you don’t plan to use it.
Also, add these tasks to prepare for the release pipeline later on:
    - task: CopyFiles@2
      inputs:
        Contents: '**'
        TargetFolder: '$(build.artifactstagingdirectory)'
    - task: PublishBuildArtifacts@1
      inputs:
        PathtoPublish: '$(Build.ArtifactStagingDirectory)'
        ArtifactName: 'drop'
        publishLocation: 'Container'
You may specify filters on the copy task if you have huge projects to speed things up. You will only need to copy the .dacpac file from the bin/release folder.
Once done, save and run will run the build pipeline for you.
Wait for it to complete, have a look at the log to make sure it doesn’t give you warnings and errors.
Also, make sure the copy task finds the dacpac file from you build.
If you push new code to the repo this build pipeline will automatically trigger.
Devops release pipeline
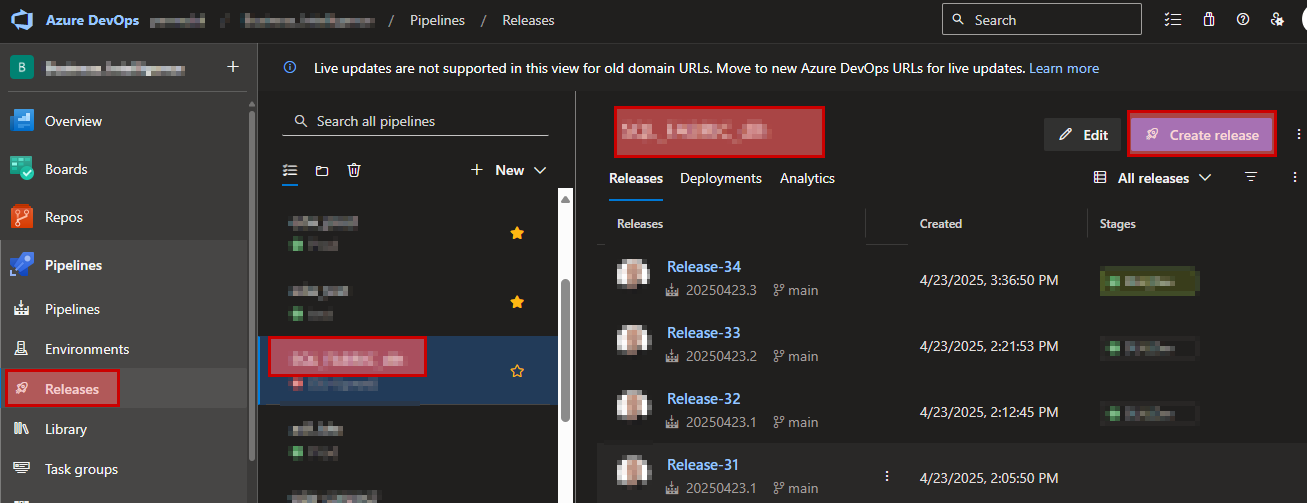
Once the build pipeline is done, you’ll need to setup a release pipeline with potential multiple stages (dev, test, prod).
Select Pipelines – Releases and click “New release pipeline” in the dropdown list.
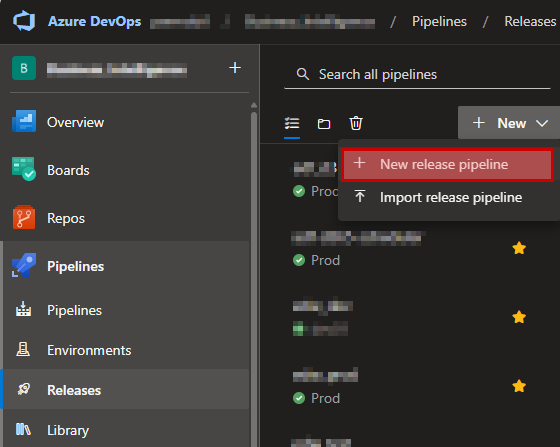
Then in the next step scroll down and select to the bottom where you’ll have the “Empty job”.
Give the stage a good name (dev for example).
Ion left hand side, click “add an artifact” and browse to your newly created build pipeline and press “add”.
Then in that same box in the upper right corner you can click on a lightning symbol where you can enable “continues deployment trigger”. This will start you release pipeline automatically for “dev” when the build completes.
Then on the right-hand side you can define jobs and task for this stage by clicking on the link symbol “1 job, 0 task”.
On the “Agent Job” right hand side you can click on the “+” sign to add tasks.
Search for dacpac and select Azure SQL Database.
The Azure SQL Database task needs to be configured correctly from top to bottom.
Use Azure Resource Manager and select a suitable service connection that you may already have created in the devops project settings.
When configuring the SQL Database, choose
- Authentication Type: Connection String
- Connection String:
Data Source=$(sql_endpoint); Initial Catalog=$(database);Authentication=Active Directory Service Principal;User Id=$(appId); Password=$(client-secret)
As you may see in the connection string there are references to variables here that also needs to be created where you add
- sql_endpoint
This is found in fabric by browsing to the lakehouse – View Details and then copy the SQL connection string.
- database
Add the name of your lakehouse in the variable.
- appId
Add the application id for you service principle found in azure app registration here.
- client-secret
Add the secret generated in Azure portal app registration for you app here.
What I had trouble with here was the the official docs regarding SQLPackage does not really cover that you are allowed to pass in appId and secret directly in you connection string.
It only covered that you can generate an access token using powershell and pass that on in the “Additional SQLPackage.exe arguments” using the variable /AccessToken:*****
I was spending a lot of time trying to implement this without much luck and was happy once I found that this step can be so much easier this way.
- Deploy type: SQL DACPAC File
- Action: Publish
- DACPAC File: browse to you dacpac file located on the drop folder
- Publish profile: not need, ignore
- Addition SQLPackage.exe Arguments: not need, ignore
Then go to variables – Pipeline variable and create the three variables sql_endpoin, database, appId, client-secret.
Remember clicking the “lock” symbol on the client-secret variable so that it won’t be available for anyone to fetch.
You may also (preferable) link your variables to a key-vault in azure, but that is not covered here.
Now save your release and start a new release based on this.
When the release pipeline has executed, carefully look at the logs to make sure it ran as expected.
Also check the end-result in your lakehouse so that all objects has been created.
Once you've got this running, you may setup more stages which allows you to publish that same database project to another lakehouse in a different workspace (test/uat/prod).
fabric, lakehouse, dacpac, publish, servicePrinciple, devops, CI/CD
- Träffar: 1435